How I Effortlessly Migrated My VPS to Another Hosting Provider
I recently had to move virtual private server (VPS) providers after I discovered that the price-performance ratio I was getting at Hetzner significantly underperformed other german hosting providers. A colleague of mine suggested Contabo, and I chose their "VPS M" package as my new instance.
I previously paid 9€ / month for 80GB SSD and 4GB RAM. The instance at Contabo is priced at 12,34€ / month for 400GB SSD and 16GB RAM, which is about a 4x in performance for a ~37% price increase. To be fair Hetzner does have a more modern UI and a great firewall control system. However, for me personally, the move was still worth it. The only obstacle was migrating the entirety of my VPS over.
Preparing the Move
We will migrate by moving over the entire disk data from the old VPS. This means that we can keep all of our configured services, user accounts, customizations and files in general.
Putting Old and New VPS Into Rescue Mode
First, we put both the old and new server into rescue mode. Rescue mode is a feature that nearly all providers offer. We require a boot into this mode so that we have access to the root partition in an unmounted state.
For Hetzner the rescue mode is provided in a tab in the main control panel of the VPS.
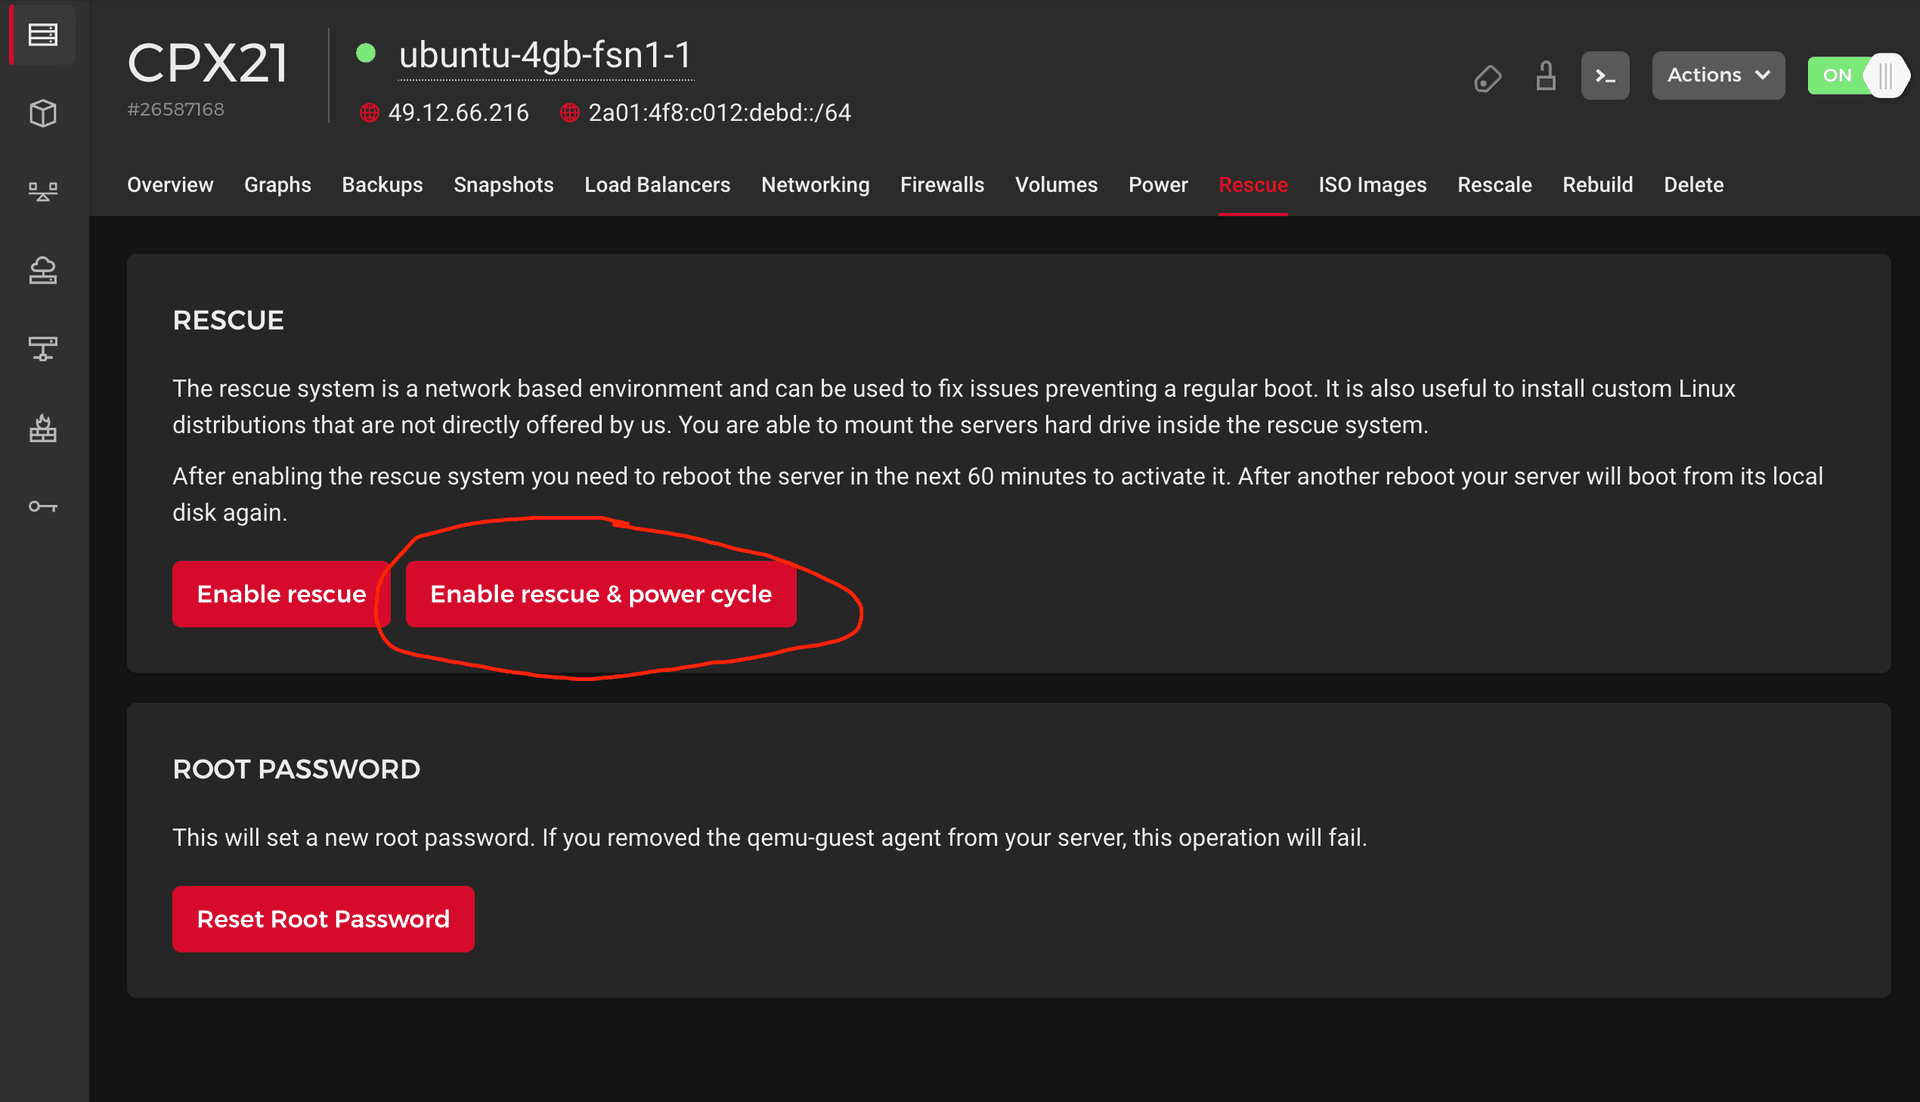
Contabo offers the rescue mode as an option in the main VPS control panel.

After the servers have rebooted into rescue mode, we need to connect to both with ssh. Depending on the provider, you may have set a new root password for the rescue mode, which you can use to log in.
Before connecting over ssh, you have to remove the lines with the IPs of the servers out of the known_hosts file in your .ssh directory. Otherwise you can't connect, because ssh suspects a MITM attack.
Determining the Disk Name
After connecting, we check the name of the main hard disk using lsblk.
Old Server
root@rescue ~# lsblk
NAME    MAJ:MIN RM  SIZE    RO  TYPE    MOUNTPOINT
loop0       7:0  0  2.8G    1   loop
sda         8:0  0  76.3G   0   disk
├─sda1      8:1  0  76G     0   part
├─sda14     8:14 0  1M      0   part
└─sda15     8:15 0  256M    0   part
sr0 11:0 1 2K 0 rom
New Server
root@vmd147327:~# lsblk
NAME   MAJ:MIN RM   SIZE RO TYPE MOUNTPOINT
loop0    7:0    0 682.9M  1 loop /usr/lib/live/mount/rootfs/filesystem.squashfs
sda      8:0    0   400G  0 disk
├─sda1   8:1    0     1M  0 part
├─sda2   8:2    0     2G  0 part
└─sda3   8:3    0   398G  0 part
In both cases /dev/sda is the name of the disk we want to move data from/to.
Moving Over All of the Things
We will copy over the entire content of the disk to the new VPS by executing the command below on the old server. We set if=/dev/sda and of=/dev/sda, because they are the names of the main disks (as discovered above).
dd if=/dev/sda bs=5M conv=fsync status=progress | gzip -c -9 | ssh root@62.171.161.119 'gzip -d | dd of=/dev/sda bs=5M'
I discovered this command on this serverfault question. It pipes the disk data into gzip compression before sending it over to the new VPS, where it is consequently decompressed and written to disk.
root@rescue:~# dd if=/dev/sda bs=5M conv=fsync status=progress | gzip -c -9 | ssh root@62.171.161.119 'gzip -d | dd of=/dev/sda bs=5M'
The authenticity of host '62.171.161.119 (62.171.161.119)' can't be established.
ECDSA key fingerprint is ___
Are you sure you want to continue connecting (yes/no/[fingerprint])? yes
Warning: Permanently added '62.171.161.119' (ECDSA) to the list of known hosts.
root@62.171.161.119's password:
81878056960 bytes (82 GB, 76 GiB) copied, 4243 s, 19.3 MB/s
dd: fsync failed for 'standard output': Invalid argument
15625+1 records in
15625+1 records out
81923145728 bytes (82 GB, 76 GiB) copied, 4245.22 s, 19.3 MB/s
0+2491559 records in
0+2491559 records out
81923145728 bytes (82 GB, 76 GiB) copied, 4247.77 s, 19.3 MB/s
For the 80GB drive the entire process took around an hour.
Connect to New VPS
Restart the Server
Now the new VPS can be restarted. If everything went well the server should boot without a problem. We can login with the user accounts and ssh passwords that were utilized on the prior server.
Again, before connecting to the instance over ssh you have to remove the lines with the IP of the new server out of the known_hosts file in your .ssh directory. Otherwise, you can't connect, because ssh suspects a MITM attack.
Verify Integrity
After connecting over ssh, we check that our docker containers are running (docker ps) and verify that all the files are where they are supposed to be. This is also a great chance to discover which services are not persisted across reboot. lsblk reveals that the new server's full capacity of 400GB is assigned to sda automatically.
kul@ubuntu-4gb-fsn1-1:~$ lsblk
NAME    MAJ:MIN RM   SIZE RO TYPE MOUNTPOINTS
sda       8:0    0   400G  0 disk
├─sda1    8:1    0 399.7G  0 part /
├─sda14   8:14   0     1M  0 part
└─sda15   8:15   0   256M  0 part /boot/efi
Point Everything to New Server
After verifying that the move was successful, we can start to point third-party services to the new server. In my particular case, I changed the DNS records in my hosting provider and adjusted the environment variables in existing deployment pipelines.
Change Hostname
Lastly, we may have to adjust the hostname of the server. Because we copied the entire disk over, it is identical to that of the old server. The hostname can be changed by editing it in /etc/hostname and /etc/hosts and subsequently rebooting.
sudo vim /etc/hostname
sudo vim /etc/hosts
sudo reboot